


Introduction
Whether you're securing pipes, suspending conduit, or anchoring machinery, U-bolts offer a simple yet reliable fastening solution. But how do you size them correctly? What's the real difference between Grade 5 and Grade 8 U-bolts? And how do they compare to clamps?
In this article, we answer the most commonly asked questions about U-bolts and guide you through their selection and usage in real-world applications.
What Is the Difference Between Grade 5 and Grade 8 U-Bolts?
The primary difference lies in tensile strength and hardness:
| Grade | Tensile Strength (psi) | Application Type |
|---|---|---|
| Grade 5 | ~120,000 | General industrial and automotive |
| Grade 8 | ~150,000+ | High-load, critical applications |
Grade 5 U-bolts are sufficient for medium-duty use, including exhaust systems, pipe support, and light structural connections.
Grade 8 U-bolts are used in high-stress environments—such as suspension systems, heavy machinery, and trailer axles—where failure is not an option.
🔧 Tip: Always match the U-bolt grade to the load requirements and safety factor of your project.
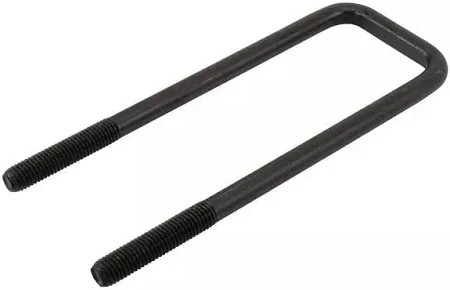
How Do You Size U-Bolts?
U-bolt sizing is based on several key dimensions. Here's how to measure correctly:
1. Inside Diameter (Pipe Size)
This is the internal width of the "U" and should match the outside diameter of the pipe or tube.
2. Inside Height
Also called the leg length, this is the distance from the inside of the curved section to the end of the legs. It determines how deep the U-bolt will sit around the object.
3. Rod Diameter
The thickness of the U-bolt shaft (e.g., 3/8", 1/2", M10, M12). This influences the load-carrying capacity.
4. Thread Length
The amount of threading on each leg; important for nut engagement and bracket thickness.
📐 Example Sizing Format: 1/2" x 2" x 4" (Rod Diameter × Inside Width × Inside Height)
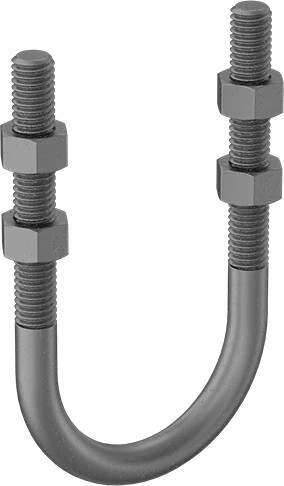
How Do You Attach a U-Bolt?
Installing a U-bolt is straightforward when done properly:
Step-by-Step Installation Guide
Position the U-bolt over the pipe, conduit, or round object.
Slide both legs through a mounting plate or bracket.
Place flat washers and nuts on each leg.
Tighten the nuts evenly, alternating between sides to ensure uniform clamping pressure.
Torque the nuts to the manufacturer’s recommendation—especially important for structural or load-bearing installations.
🛠️ Optional: Use lock washers or nylon lock nuts to prevent vibration loosening.
What Is the Difference Between a Clamp and a U-Bolt?
Though both are used for securing components, they serve slightly different purposes:
| Feature | U-Bolt | Clamp |
|---|---|---|
| Shape | "U"-shaped fastener | Flat or rounded, 2-piece design |
| Installation | Requires bracket/nuts | Typically includes its own body |
| Use Case | Pipes, poles, round tubing | Hose connections, flat mounting |
| Load Direction | Axial or clamping | Mostly radial or axial pressure |
U-bolts are ideal for holding round objects to flat surfaces.
Clamps often come with their own brackets or saddles and may apply 360° pressure—ideal for hoses and flexible tubing.
Additional Tips for Using U-Bolts
✔ Use the Right Material
Zinc-plated steel: for indoor or light-duty outdoor use
Hot-dip galvanized: for weather and corrosion protection
Stainless steel (A2, A4): for marine, chemical, or coastal environments
✔ Avoid Over-Tightening
Excessive torque can deform the U-bolt or damage the pipe. Use a torque wrench and refer to the product's recommended tightening values.
✔ Match Hardware
Use grade-matched washers and nuts to ensure even load transfer and avoid galvanic corrosion between dissimilar metals.
Conclusion
From securing heavy-duty piping to stabilizing vehicle axles, U-bolts provide a dependable, customizable fastening solution across industries. Understanding the difference between grades, learning how to properly size and install, and knowing when to choose a clamp instead can dramatically improve system integrity and longevity.
By selecting the correct material, grade, and fit, and following best practices during installation, you ensure safe and efficient performance in every project.


